React State Management The Easy Way, With Redux

Hi there! I'm a technical writer with a keen interest in web development, blockchain technology, and software concepts. With my experience in React and blockchain development, I bring a unique perspective to my writing. I'm passionate about simplifying complex technical topics and making them easily understandable for everyone. My goal is to share my knowledge and insights with others to help them better understand the exciting world of technology. When I'm not writing, you can find me exploring the latest developments in web development and blockchain technology, or trying out new programming languages.
React is a popular front-end JavaScript library that is widely used for building interactive user interfaces.
Over time, react has grown to become the most popular library for building scalable web (and mobile) applications.
As far as applications built with react go, one of the key features of any interactive application is the ability to manage state. In simple terms, state refers to the data or information that is stored and managed within a React component and the application at large.
It represents the current state of the component and determines how it will be rendered or displayed to the user.
For example, in a simple form component for a food ordering app, the state would include information such as the user's input values like their address, their order and their name.
As the user inputs data into this form, the state would be updated accordingly and the component would re-render with the new state data displayed to the user.
State management in React can become complex pretty quickly as the application grows, making it very difficult to keep track of which data goes where.
This is where state management libraries like Redux come in.
The Unidirectional Flow Of Data In React
In React, data flows in a unidirectional manner. This means that data flows in one direction only.
In essence, data can only flow from parent components to child components through props, and never in reverse.
This means that child components cannot pass data to their parents or their siblings, and can only pass data downwards.
The Need for state management libraries
As applications become larger and more complex, it can become difficult to manage the state effectively. This can result in bulky and difficult-to-maintain or debug code.
State management libraries like Recoil, Context API and of course, Redux, help to address these challenges by providing a centralized store for the application state.
They provide a sort of data bucket which each component can pull data from, regardless of how far nested they are.
Redux and the others in this case, also provide a set of tools for updating and accessing this state predictably and efficiently.
Introduction to Redux
Redux is a popular state management library for React applications that was first introduced in 2015.
It provides a single, immutable state tree for an application and a set of rules for updating this state in response to user actions or other events.
Redux is based on the Flux architecture, which separates the application state from user interface components and uses a unidirectional data flow.
One of the key benefits of Redux is its ability to simplify state management in large, complex applications. By providing a single source of the state in an application, Redux makes it easier for all components to access data when and where needed.
Redux also provides a set of tools for debugging and testing, which can help to identify and resolve issues more quickly.
In addition to its core features, Redux has a large and active community of developers who have created a wide range of plugins, extensions, and middleware that can be used to extend its capabilities.
This includes tools for integrating with other libraries and frameworks, as well as for managing asynchronous actions and handling complex state structures.
Redux Basics
Principles of Redux
Redux is a predictable state container for JavaScript applications. It is based on three principles:
- Single source of truth:
The entire state of an application is stored in a single object tree within a single store. This makes it easy to understand and debug the state of an application.
- State is read-only:
The only way to change the state of the application is by emitting an action. Actions are objects that describe what happened in the application.
- Changes are made with pure functions:
Reducers are pure functions that take the current state of the application and an action and return a new state. They are the only way to update the state of the application.
Redux Data Flow
The data flow in Redux follows a strict unidirectional pattern, which is similar to the unidirectional flow of data in React.
A component dispatches an action.
The store, which holds the entire state of the application, receives the action.
The store passes the current state of the application and the action to a reducer.
The reducer returns a new state based on the current state and the action.
The store updates the state of the application with the new state returned by the reducer.
The store notifies all subscribed components of the state change.
The subscribed components receive the new state and update their views.
Core concepts of Redux
- Store:
The store is a JavaScript object that holds the entire state of the application. It is created using the createStore function provided by Redux.
Below is a snapshot of how to add the createStore() function to the index component of a react application.

- Actions:
Actions are plain JavaScript objects that describe what happened in the application. They must have a type property, which is a string that describes the action.
- Reducers:
Reducers are pure functions that take the current state of the application and action and return a new state. They are responsible for updating the state of the application in response to actions.
- Dispatch:
The dispatch method is used to dispatch an action to the store. It is the only way to update the state of the application.
- Subscribe:
The subscribe method is used to register a function to be called every time the state of the application changes. This function should update the view of the component based on the new state.
- Middleware:
Middleware is a function that is applied to the dispatch method before the action is passed to the reducer. It can be used to intercept actions and modify them before they reach the reducer, or to perform side effects such as logging or making API requests.
Setting up Redux
Installation and setup of Redux
1. To get started with Redux, you'll need to install it as a dependency in your React project. You can do this using npm or yarn by navigating to the root directory of your project using
cd <my project name>

…and running the following command:
npm install redux

For Node Package Manager (NPM) users, Or
yarn add redux
…for yarn users.
2. Wait for the packages to install.
3. Once you've installed Redux, you'll need to set up your project to use it:
4. Create a new directory called "store" in your project's root directory.

5. This directory will contain all the files related to your Redux store and leads to the next few steps to understanding redux.
Creating the Redux Store
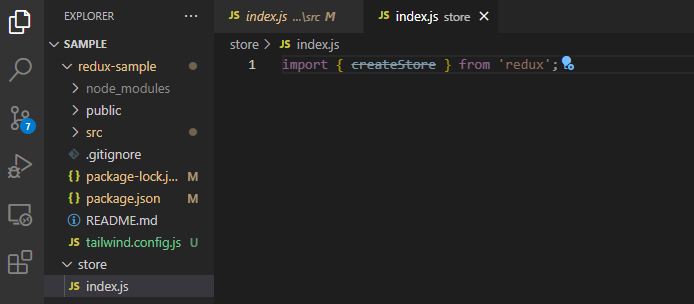
1. The next step is to create the Redux store itself. In the "store" directory, create a new file called "index.js". This file will be the entry point for your Redux store.
In "index.js", you'll need to import the "createStore" function from the Redux package:
import { createStore } from 'redux';
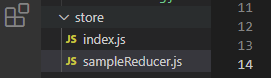
2. Next, you'll need to create another file in the store folder. This folder will contain a sample reducer, as shown below. For this example, we’ll call the reducer folder “sampleReducer”.
This reducer function we put into the file will be responsible for updating the state of your application in response to actions. A reducer function takes two arguments: the current state of the application and an action object that describes the change to be made to the state.
Here's an example of a simple reducer function:
const initialState = {

  count: 0

};

function reducer(state = initialState, action) {

  switch (action.type) {

    case 'INCREMENT':

      return { ...state, count: state.count + 1 };

    case 'DECREMENT':

      return { ...state, count: state.count - 1 };

    default:

      return state;

  }

}
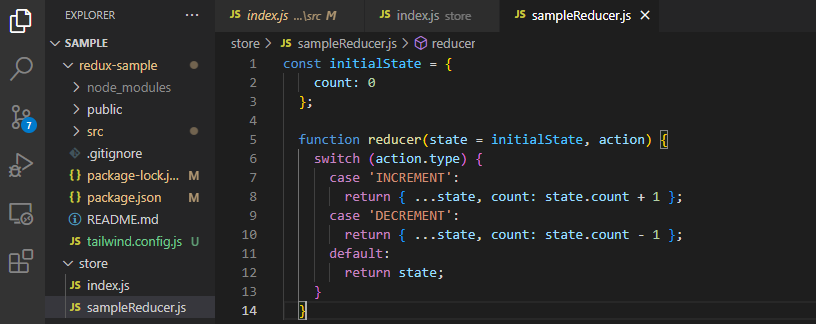
This reducer function takes an initial state object with a count property set to 0, and responds to two different types of actions: "INCREMENT" and "DECREMENT".
When an "INCREMENT" action is dispatched, the reducer returns a new state object with the count property incremented by 1.
Similarly, when a "DECREMENT" action is dispatched, the reducer returns a new state object with the count property decremented by 1.
If the reducer receives an action that it doesn't recognize, it simply returns the current state object.
Now that you've created your reducer function, you can create the Redux store by calling the "createStore" function and passing in your reducer function:
const store = createStore(reducer);

Configuring the Store with middleware
Finally, you may want to configure your store with middleware, such as the "redux-thunk" middleware for handling asynchronous actions. To do this, you can import the middleware and pass it as a second argument to the "createStore" function:
import thunk from 'redux-thunk';

const store = createStore(reducer, applyMiddleware(thunk));

With this configuration, you can now dispatch actions to your Redux store and handle state updates in your React components.
Actions and Reducers
Creating Actions
In Redux, actions are plain JavaScript objects that describe changes that should be made to the state of your application. An action object must have a "type" property that describes the type of action being performed, as well as any additional data required to perform the action.
To create an action in Redux, you can define a function that returns an action object.
Let’s create a sample action, shall we?
1. In the store folder, create a file and call it whatever you like. In this case, we’ll call ours “sampleAction.js”

2. Put the following code in the file, and let’s walk through step by step
export function incrementCounter(amount) {

  return {

    type: 'INCREMENT_COUNTER',

    payload: amount

  };

}

In this example, we're defining an action creator function called "incrementCounter" that takes an "amount" parameter and returns an action object with a "type" of "INCREMENT_COUNTER" and a "payload" of the amount passed to the function.
You can then dispatch this action in your application by calling the "dispatch" method on your Redux store object:
store.dispatch(incrementCounter(2));
In this example, we're calling the "incrementCounter" function with an amount of 2 and passing the resulting action object to the "dispatch" method on our Redux store object.
Creating Reducers
Reducers are functions that take the current state of your application and an action object and return a new state object that reflects the changes described by the action.
To create a reducer in Redux, you can define a function that takes two parameters:
the current state
and an action object.
Here's an example of how to create a reducer that handles the "INCREMENT_COUNTER" action:
1. Create a sample file in the store folder of your root directory and give it a name. Say, “sampleReducer.js”
2. Put the following code in it
export function counterReducer(state = { count: 0 }, action) {

  switch (action.type) {

    case 'INCREMENT_COUNTER':

      return { ...state, count: state.count + action.payload };

    default:

      return state;

  }

}

In this example, we're defining a reducer function called "counterReducer" that takes an initial state object with a "count" property set to 0, and an action object. When the "INCREMENT_COUNTER" action is dispatched, the reducer returns a new state object with the "count" property incremented by the value of the "payload" property on the action object. If the action is not recognized by the reducer, it simply returns the current state object.
Back in the sampleReducer.js file, you can then combine multiple reducers into a single reducer function using the "combineReducers" method provided by Redux:
import { combineReducers } from 'redux';


export const rootReducer = combineReducers({

  counter: counterReducer,

  todos: todosReducer,

  // ...

});

In this example, we're importing the "combineReducers" method from the "redux" package and using it to combine multiple reducers into a single "rootReducer" function.
The "counterReducer" and "todosReducer" functions are defined above and handle updates to the "counter" and "todos" properties of the state object, respectively.
By defining actions and reducers in this way, you can create a predictable and scalable architecture for your application that makes it easier to reason about and maintain over time.
Actions and Reducers
Handling Actions with Reducers
After creating actions, the next step is to define reducers that handle these actions. A reducer is a pure function that takes in the current state and an action and returns a new state. The reducer function should not modify the existing state, but instead, should return a new state object.
Reducers should handle different action types and return the appropriate state for each action. It is good practice to define a default state in the reducer function that gets returned when an unknown action type is dispatched.
Immutable state
Redux stores the state as a plain JavaScript object. It is crucial to ensure that the state remains immutable, meaning that it cannot be modified directly. Any changes to the state should be made by creating a new object that represents the new state.
Modifying the state directly can cause issues with change detection and make it difficult to trace changes to the state.
Reducer composition
Redux provides the ability to create small, single-purpose reducers that handle a specific part of the application state. These small reducers can be combined to form a larger reducer that handles the overall application state.
This is known as reducer composition and is a powerful way to keep the code modular and maintainable. The combineReducers function provided by Redux is used to combine these small reducers into a larger one.
Handling async actions
In some cases, actions may involve asynchronous operations like API calls, which cannot be handled synchronously in a reducer. In such cases, we can use middleware like redux-thunk or redux-saga.
Redux-thunk allows us to dispatch functions as actions instead of plain objects. These functions can contain asynchronous operations and can dispatch the actual actions once the asynchronous operation completes.
Connecting React with Redux
Integrating Redux with React
To use Redux with React, we need to wrap the entire application with a Provider component provided by the react-redux library. The Provider component takes in the Redux store as a prop and makes it available to all the components in the application.
To do this,
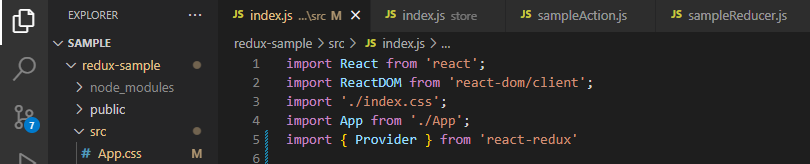
[if !supportLists]1. [endif]Open the index.js file that serves as the entry point to your application and import the Provider like so:
import { Provider } from ‘react-redux’
2. Import the store object you created in the “index.js/store” folder in the root directory.

3. Wrap the <App/> component in the Provider, and pass in the Store object

Accessing the Store with Connect
The connect function provided by the react-redux library is used to connect components to the Redux store. This function takes in two arguments: mapStateToProps and mapDispatchToProps.
mapStateToProps is a function that maps a part of the Redux store to the component props, while mapDispatchToProps maps dispatching actions to the component props.
Dispatching Actions from React components
To dispatch actions from React components, we use the dispatch function provided by the connect function. This function maps the dispatching of an action to a prop in the component, allowing us to trigger actions by calling the prop function.
For example, assume we have a component called “sampleComponent.js”
This component contains a button we wish to use as a form of control for our counter in the previous example.
import { connect } from 'react-redux';

import { incrementCount } from '../actions';


const Counter = ({ count, incrementCount }) => {

  return (

    <div>

      <h1>Count: {count}</h1>

      <button onClick={() => incrementCount()}>Increment</button>

    </div>

  );

};


const mapStateToProps = (state) => {

  return { count: state.count };

};


export default connect(mapStateToProps, { incrementCount })(Counter);
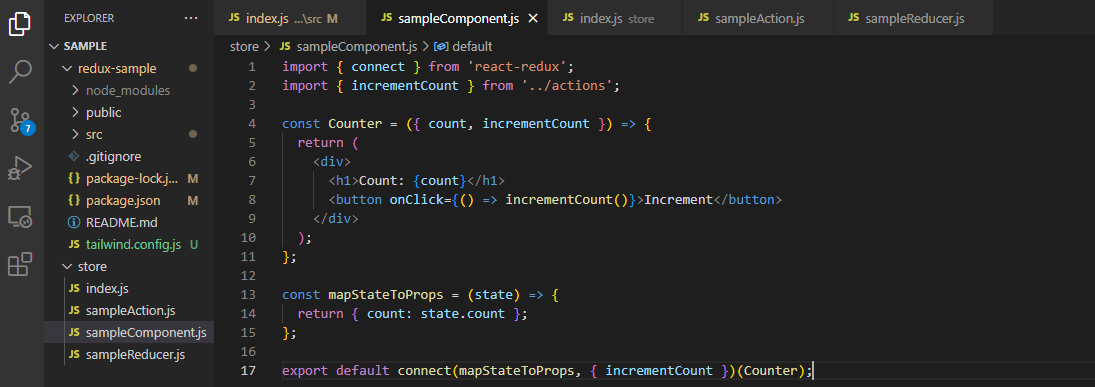
In this example, the incrementCount function is mapped to the component props using mapDispatchToProps. The function can be called in the component by triggering the incrementCount prop function.
Advanced Redux Concepts
Redux offers a lot of advanced features to handle complex scenarios. Here are some of the advanced concepts in Redux that are worth learning.
Using Middleware in Redux
Middleware is a function that can intercept the actions dispatched to the Redux store. It can modify or dispatch new actions based on the intercepted actions. Middleware is a powerful tool in Redux, and it can be used for many purposes such as logging, analytics, routing, and caching.
To use middleware in Redux, you need to create a middleware function and pass it to the applyMiddleware() function. Here's an example we put in the store/index.js file:
import { createStore, applyMiddleware } from 'redux';

import thunkMiddleware from 'redux-thunk';

import loggerMiddleware from 'redux-logger';

import rootReducer from './reducers';


const middleware = [thunkMiddleware, loggerMiddleware];

const store = createStore(rootReducer, applyMiddleware(...middleware));

In this example, we have created an array of middleware functions and passed it to the applyMiddleware() function. The thunkMiddleware is used to handle asynchronous actions, and the loggerMiddleware is used to log the actions and the state changes.
Understanding Thunks
Thunks are a type of middleware that allows you to write action creators that return a function instead of an action. This is useful when you need to perform asynchronous operations, such as fetching data from an API, before dispatching an action. Thunks can also be used to dispatch multiple actions based on the result of an asynchronous operation.
Here's an example of a thunk that fetches data from an API and dispatches an action when the data is loaded:
export const fetchPosts = () => {

  return async (dispatch) => {

    dispatch({ type: 'FETCH_POSTS_REQUEST' });

    try {

      const response = await fetch('https://api.example.com/posts');

      const data = await response.json();

      dispatch({ type: 'FETCH_POSTS_SUCCESS', payload: data });

    } catch (error) {

      dispatch({ type: 'FETCH_POSTS_FAILURE', error });

    }

  };

};

In this example, we have defined a function that returns a function. The returned function accepts the dispatch function as an argument, which can be used to dispatch actions. Inside the returned function, we dispatch an action with the type FETCH_POSTS_REQUEST to indicate that the request is started. Then we use the fetch() function to fetch data from an API, and dispatch an action with the type FETCH_POSTS_SUCCESS when the data is loaded. If there's an error, we dispatch an action with the type FETCH_POSTS_FAILURE.
Best Practices for Structuring Redux Code
As your Redux application grows, it's important to structure your code in a way that makes it easy to maintain and extend. Here are some best practices for structuring your Redux code:
The state tree in Redux should be kept as simple and flat as possible. Avoid nesting objects and arrays, as it can make it difficult to update the state and can lead to performance issues.
Avoid Direct Manipulation of State: The state in Redux should be treated as immutable. Avoid modifying the state directly, and always return a new state object from the reducer.
Use Selectors to Retrieve State: Selectors are functions that retrieve data from the Redux store. They can be used to derive data from the state tree and can help to decouple the components from the shape of the state tree.
Separate Container and Presentational Components: Container components are responsible for connecting the Redux store to the presentational components.
Presentational components are responsible for rendering the UI. Separating these components can make it easier to maintain and test your application
Redux DevTools
Overview of Redux DevTools
Redux DevTools is a browser extension that provides a powerful set of debugging tools for Redux applications. It helps developers to visualize the application state, inspect dispatched actions, and time travel through state changes.
With Redux DevTools, developers can:
Inspect the state tree and view its changes over time.
Replay and revert actions to see how the state changes.
Monitor performance and view detailed information about each action.
Debug complex application behaviour more easily.
Installing and setting up DevTools
To install Redux DevTools, you need to add it as a browser extension. The most popular browser extensions are:
Once you have installed the extension, you can use it with your Redux application. To set up DevTools, you need to add the Redux DevTools enhancer to your Redux store.
Here is an example of how to set up DevTools:
import { createStore, applyMiddleware, compose } from 'redux';

import rootReducer from './reducers';

import thunk from 'redux-thunk';

import { composeWithDevTools } from 'redux-devtools-extension';


const initialState = {};

const middleware = [thunk];

const enhancers = [];


const composedEnhancers = composeWithDevTools(

  ...enhancers,

  applyMiddleware(...middleware)

);


const store = createStore(

  rootReducer,

  initialState,

  composedEnhancers

);


export default store;

Using DevTools for debugging
Once you have set up DevTools, you can open it in your browser's developer tools panel. The DevTools panel displays the current state of the application, the actions that have been dispatched, and the performance of the application.
To use DevTools for debugging, you can:
Inspect the state tree: Click on the State tab to view the current state of the application. You can expand the state tree to inspect each property.
Time travel through state changes: Click on the Actions tab to view the list of dispatched actions. You can replay or revert actions to see how the state changes.
Debug performance issues: Click on the Performance tab to view detailed information about each action, including the time it took to complete.
Overall, Redux DevTools is a powerful tool that can help you debug and optimize your Redux applications. By using it, you can quickly identify and fix issues in your code, leading to a better user experience for your application's users.
Conclusion
Recap of key concepts
In this article, we have covered the basics of Redux and how it can be used for state management in a React application. We explored the core concepts of Redux, including the unidirectional flow of data and the principles of reducers, actions, and the store. We also looked at more advanced topics such as middleware, thunks, and DevTools.
Benefits of using Redux for state management
Using Redux for state management has many benefits, including:
Predictable state management: Redux allows you to manage your application state predictably, making it easier to debug and maintain your code.
Centralized state: With Redux, your entire application state is stored in a single store, making it easy to access and modify.
Easy debugging: Redux DevTools provide powerful debugging capabilities, allowing you to easily trace changes to your application state over time.
Easier testing: By separating the state management logic from your React components, it becomes easier to test your application logic in isolation.
Additional resources and further reading
If you want to learn more about using Redux in your React applications, here are some additional resources and further reading:
Redux documentation: The official documentation for Redux provides a comprehensive guide to using Redux in your applications.
Redux Toolkit: Redux Toolkit is a set of tools and utilities designed to make working with Redux easier and more efficient.
React-Redux documentation: The official documentation for React-Redux provides a guide to integrating Redux with your React components.
Advanced React Redux Tutorials: A series of advanced tutorials on using Redux in React applications.
Overall, Redux is a powerful and flexible state management library that can greatly simplify the management of complex states in your React applications. By following the principles of Redux and the best practices outlined in this article, you can build scalable, maintainable, and reliable React applications.


